
A Root-Over-Rock Salvage Operation – Part 2
With Some Second Thoughts About The Process
by Dierk N.
February, 2016
Almost two years ago I wrote an article on a Strangler fig (probably Ficus aurea (syn. Ficus tecolutlensis)) that had survived the seven days without power in my greenhouse after the 2013 Christmas ice storm. That article can be found on the club’s web site at the following address: Root-Over-Rock Salvage Operation
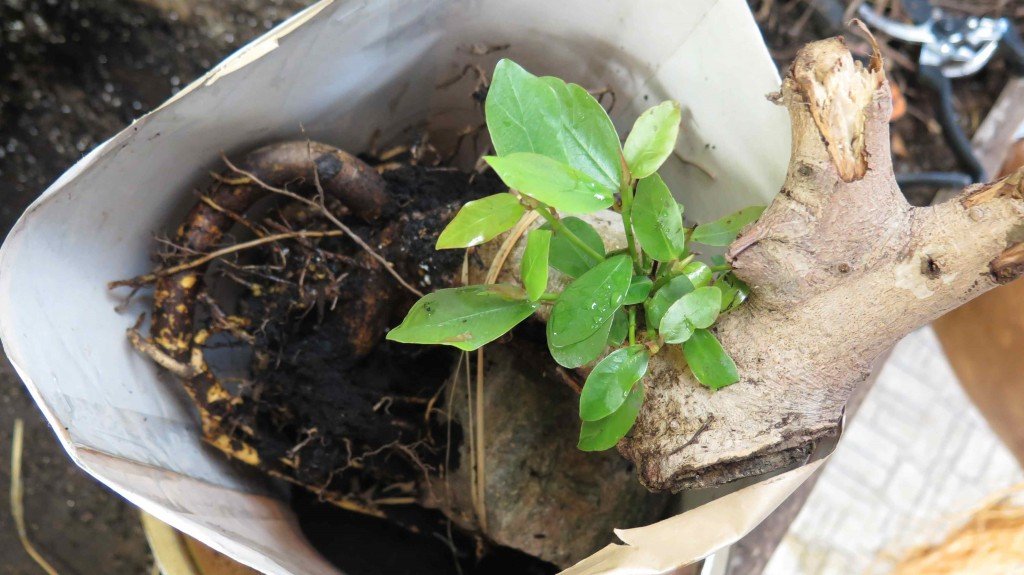

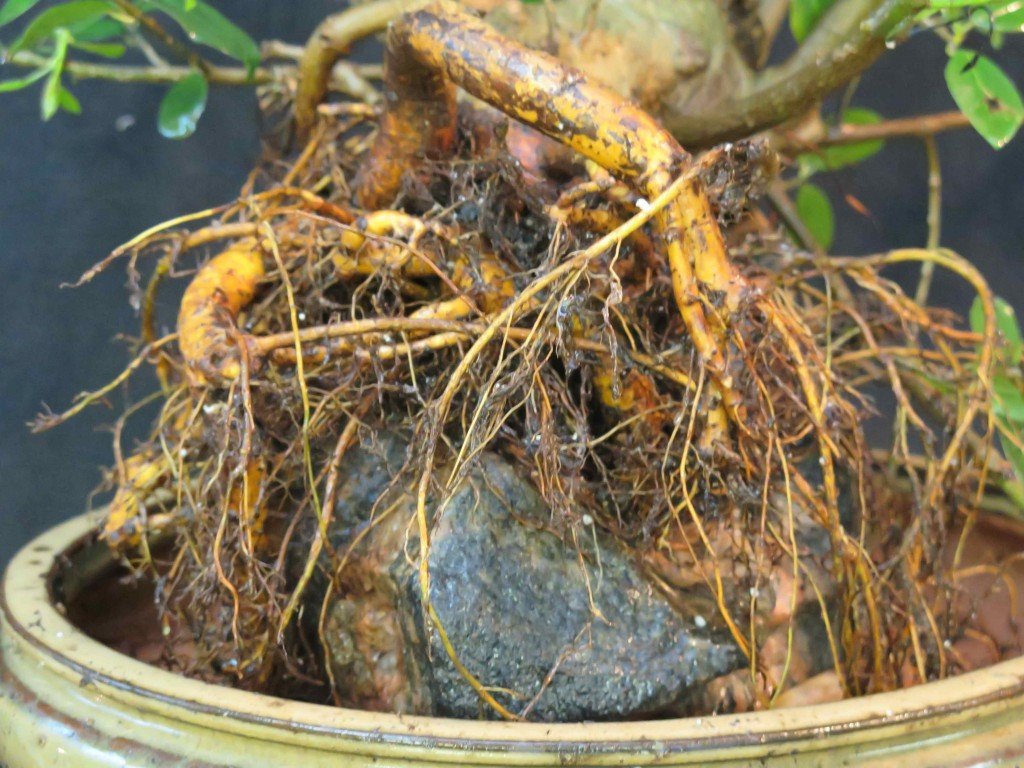
Once I removed the outer wrapping around the tree, I discovered an abundance of roots as can be seen from the pictures below.

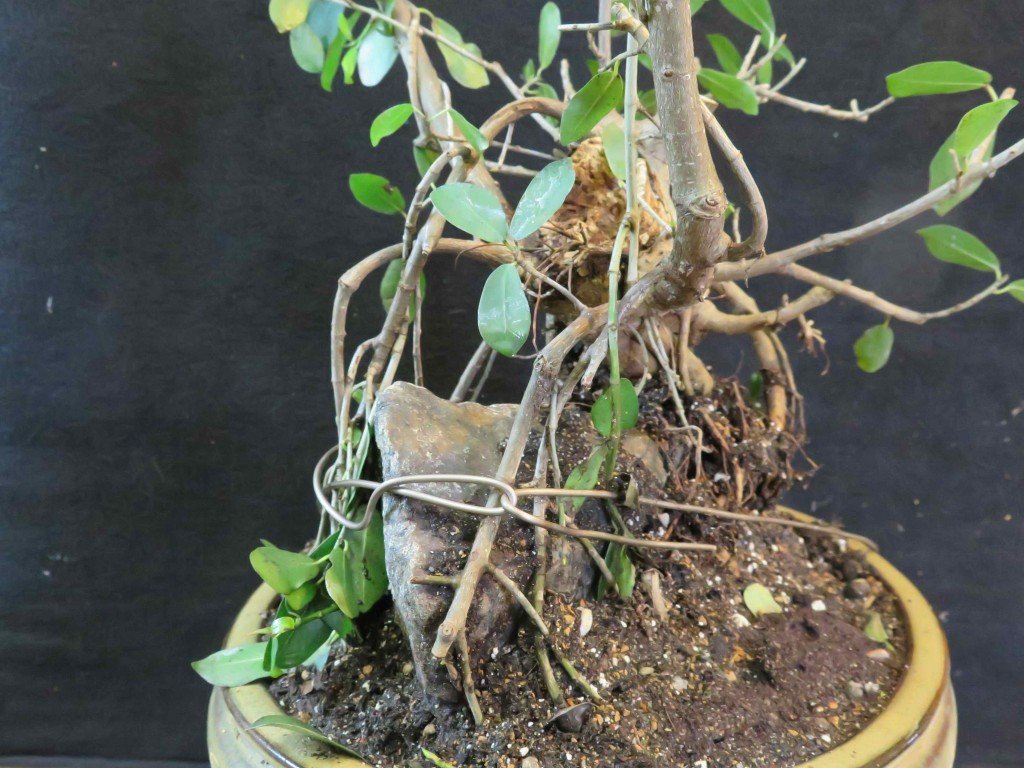
Next came the business of removing all of the soil to see just what I got in the line of roots. While doing this, I discovered that the silicone seal that had fastened the rock to the pot had not adhered, and that the rock and the tree were loose, not only from the pot, but also from each other; that is, the roots had not managed to hold onto the rock. I had expected that the roots would basically cling to the rock since there was little soil between the rock and the original wrapping that held everything in place. My mistake was not fastening the roots to the rock originally with twine, wire or foil. To make matters worse, the roots were now so large that they could not be forced into place. This is all evident in the pictures that follow.
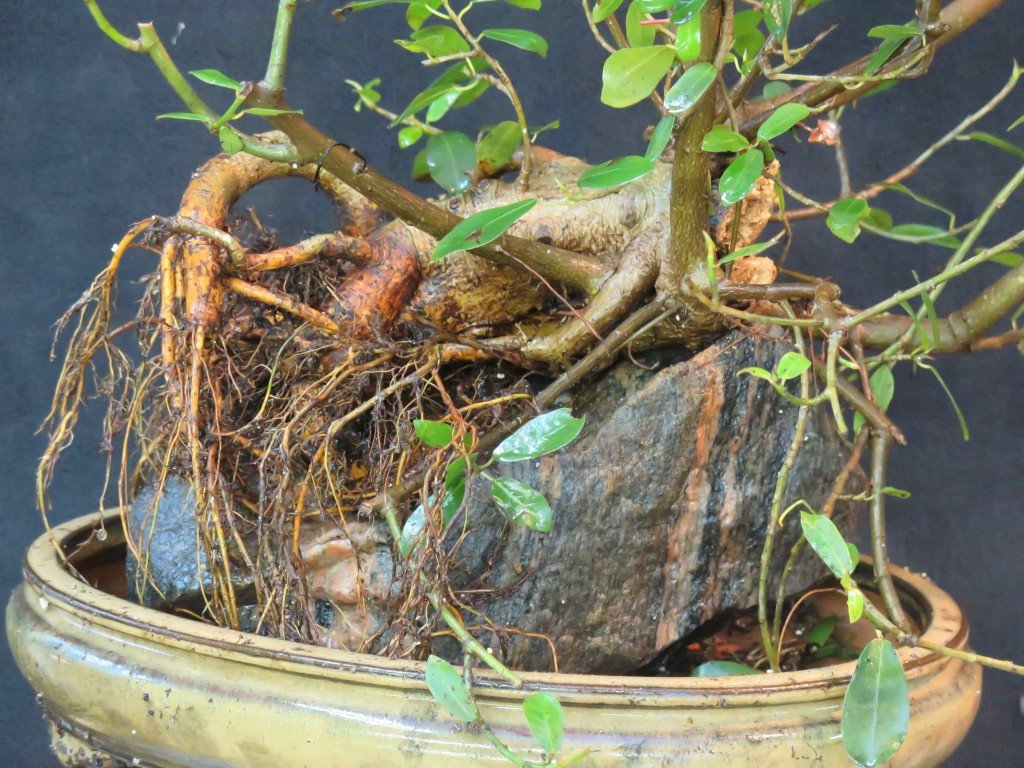
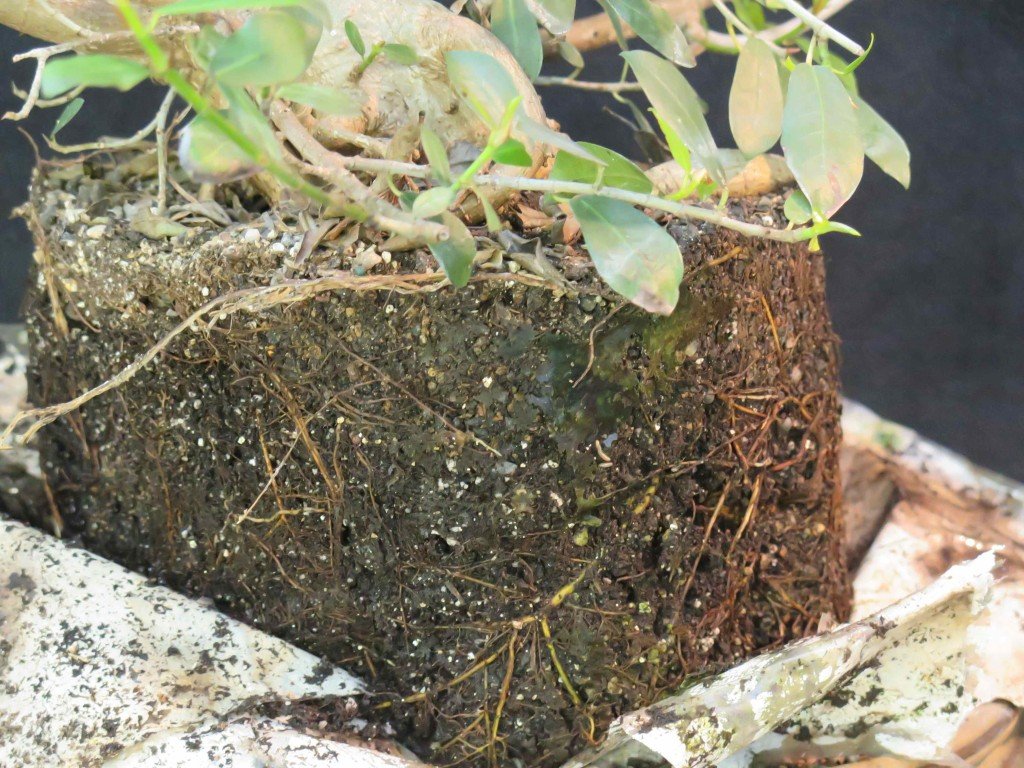
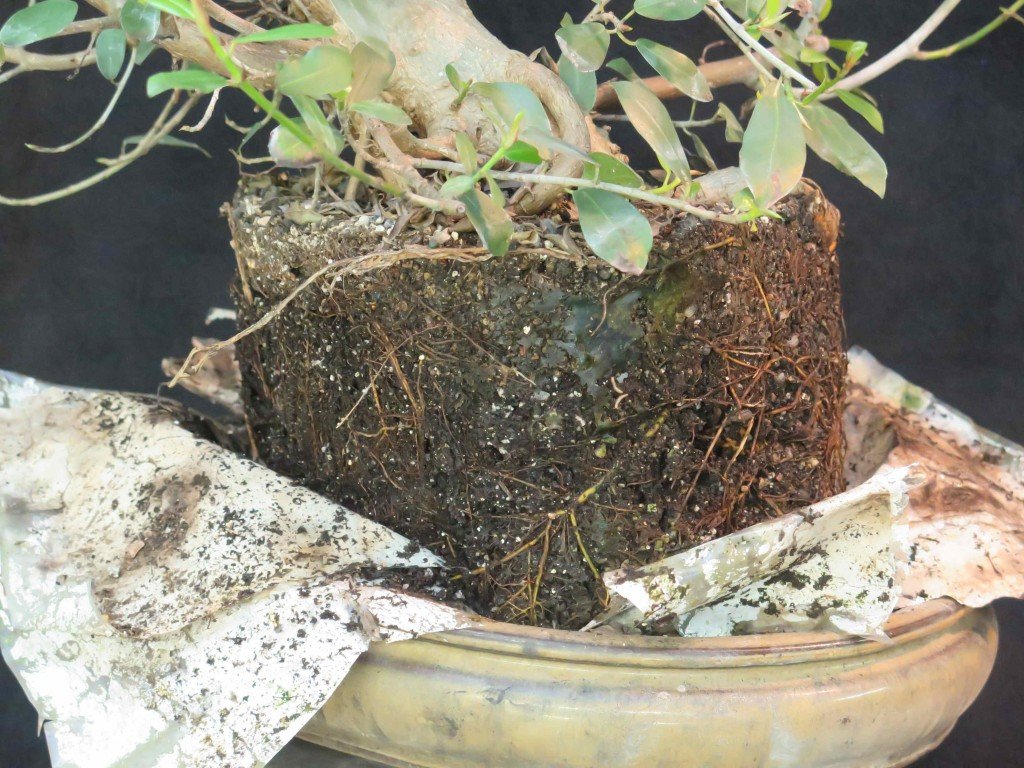
I decided to plant the tree on the rock anyway, and to force some of the branches into the bottom of the pot, thus helping to hold the tree in place. The wire you see in the picture below hopefully helps to accomplish this task.
Next I anchored the tree into the pot along with its rock with bonsai soil. Eventually I expect to use more wires to hold everything in place. The pictures below show this stage of the process.

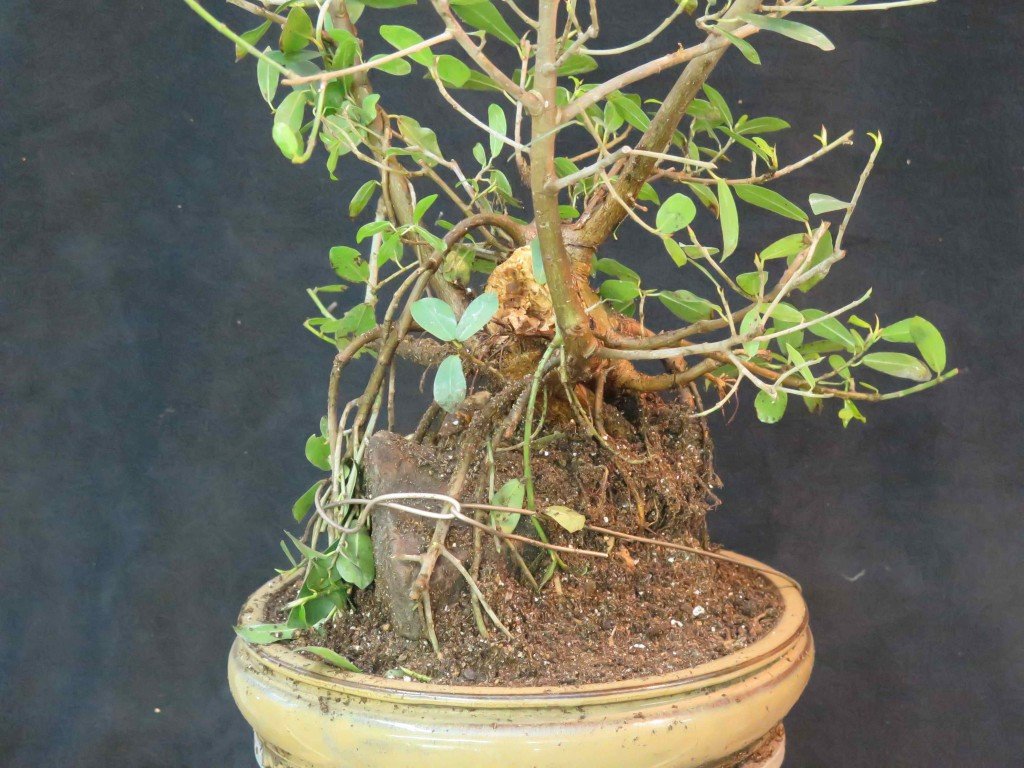
I have let a few days pass in order to contemplate what I ought to do next. I finally decided that two things had to happen immediately so that development of both roots and branches could proceed instead of being put off for another year or more: unnecessary and unsightly roots needed to be removed, and styling decisions had to be made for the upper part of the tree so that I did not just have a jumble of branches going everywhere. The pictures below with their accompanying explanations will hopefully clarify my thinking at the time.
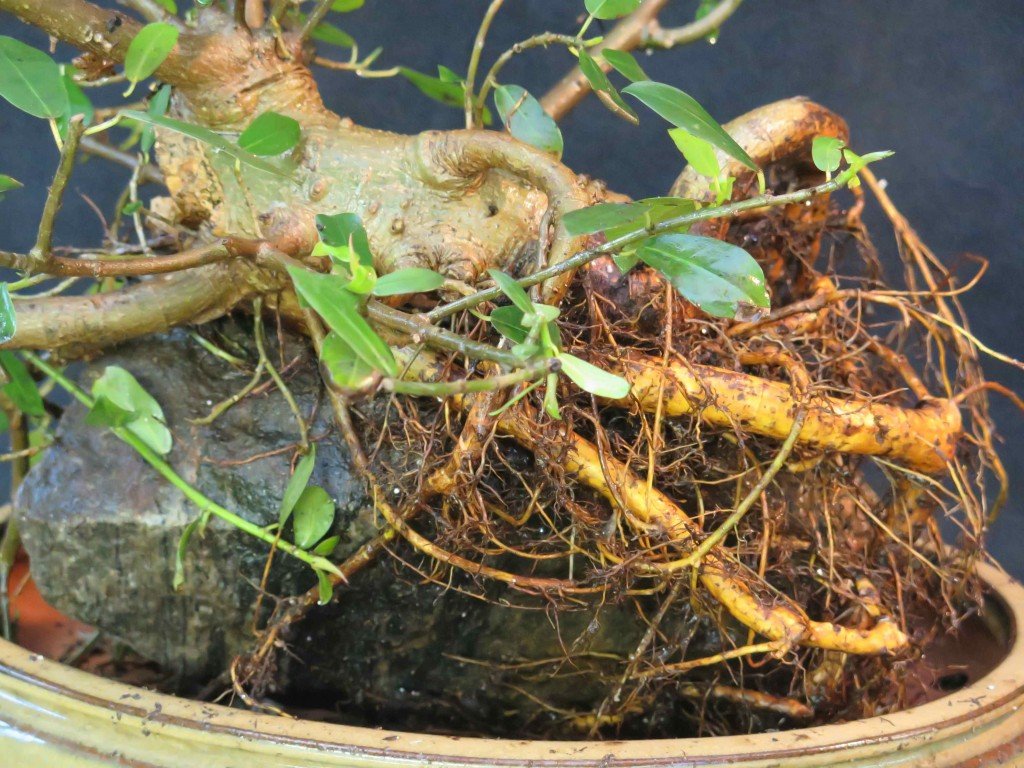
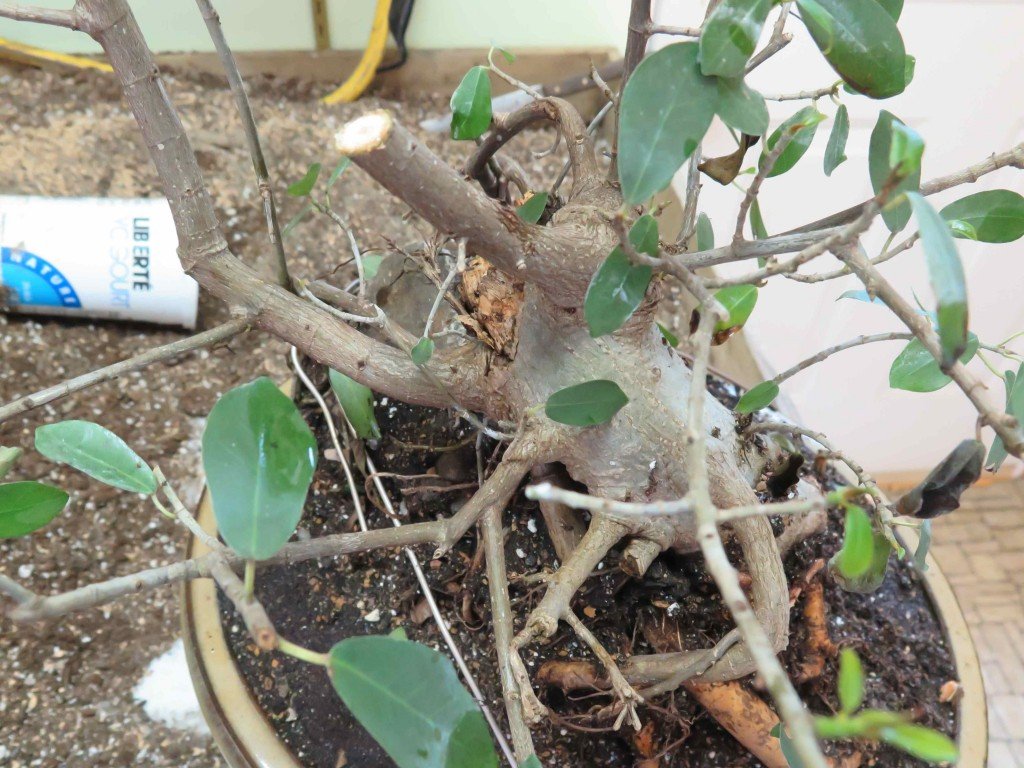
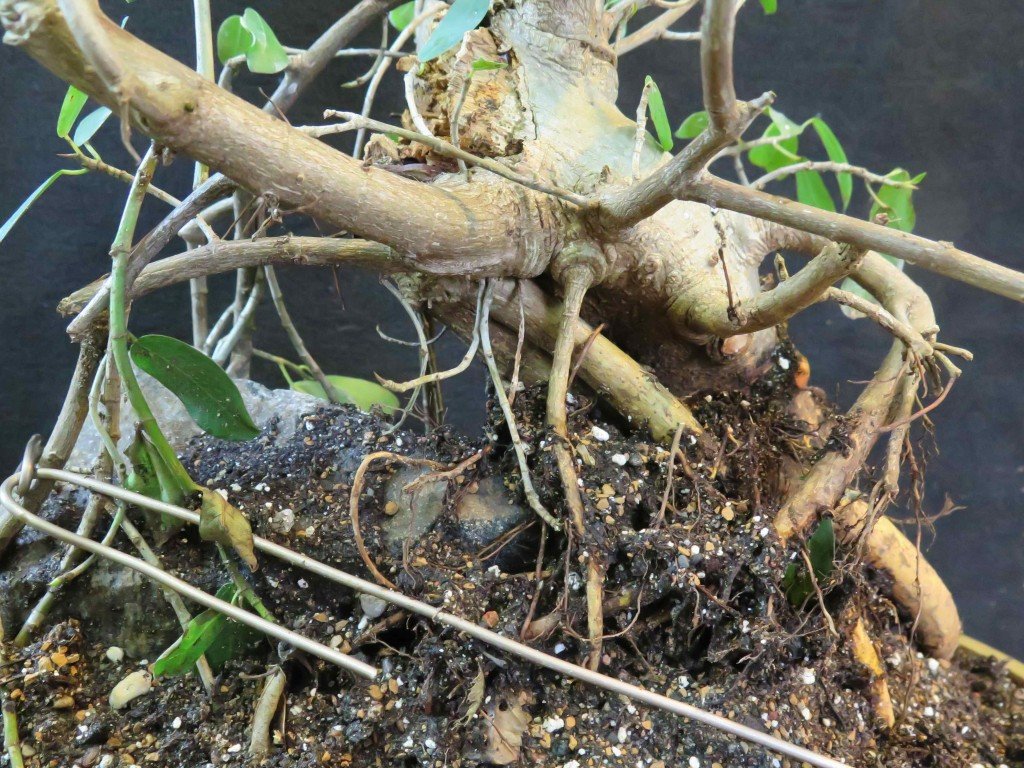
I removed the large root which was protruding from the lower end of the tree since it would never be visually appealing. The large cut can be somewhat camouflaged with dirt or cut paste and will eventually recede as other roots expand around it. The other two large roots that are visible here on the left and underneath the cut are necessary to hold the tree in place and are actually quite close to the rock. Eventually they may form a lower extension of the trunk.

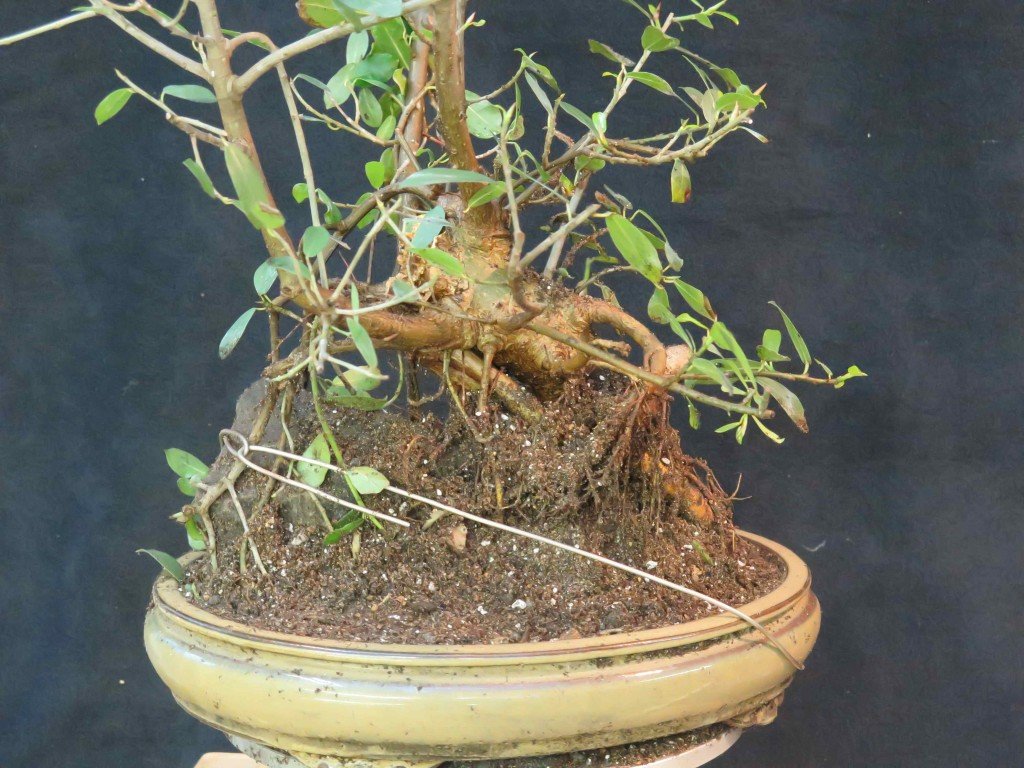
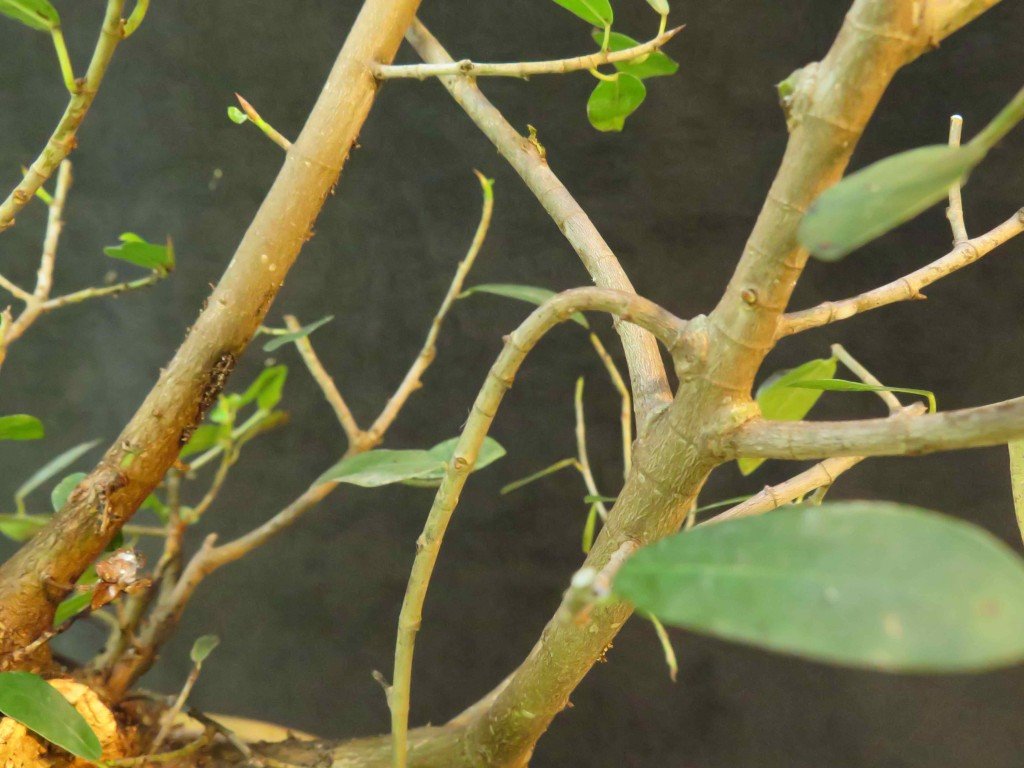
The picture shows several thick branches that had been allowed to grow unchecked for two years. Since they were very straight and difficult to bend I decided to remove the largest one – the stub is seen here and was subsequently shortened even more. The others were cut back a little as seen on the right. I wrapped several long, thin branches around them, as might happen in the tropics with this kind of tree.
This view from the top of the tree shows that branching is happening in all directions around the trunk. I shortened some of these a little more and time will tell whether the tree will keep all of these in the future. Much depends here on the tree developing a direction as it grows and whether the central apex, which right now is very weak, will become more prominent.

The picture below shows several branches that have been bent down and placed into the soil to root and form trunk-like appendages as would be found in nature.

This view from the side shows that roots are still an issue, as well as some of the straight branches heading left and right. These may get wired or shortened.

Another view of the branches that have been anchored in the soil.

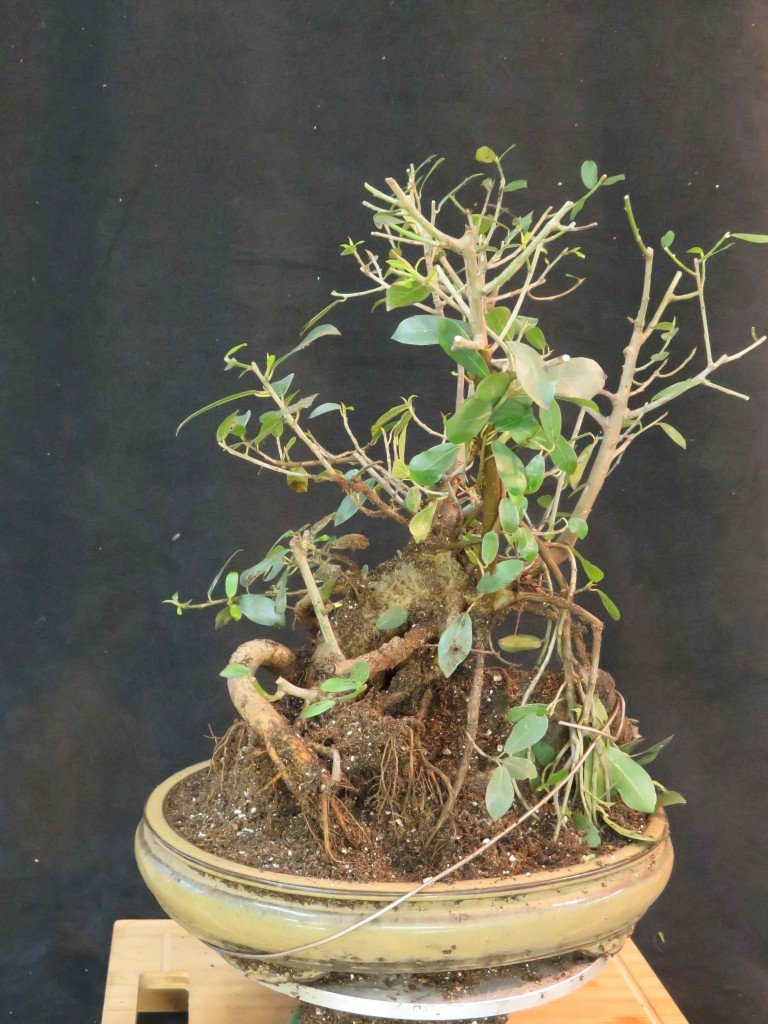
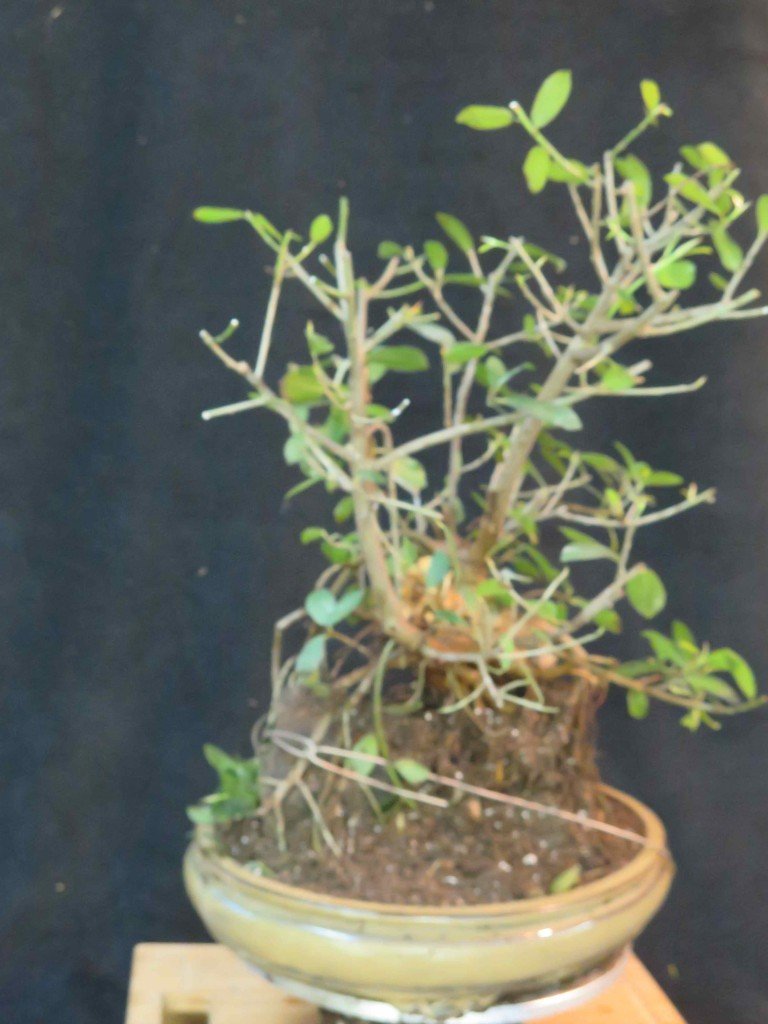
Here are two views of the final tree. The design, though still cluttered, is simpler than before – there is no real sense of direction in the tree’s growth at this time. The large, left branch in the right picture is still offensive – it is too straight for the design, and too overpowering. I may yet remove it as well as the curved “aerial” root on the right.
Some Final Thoughts On The Process
http://bonsai4me.com/AdvTech/ATRootoverrock.htm
http://bonsai4me.com/AdvTech/ATRootoverrock.htm
http://www.bonsaiempire.com/blog/ficus-styling
http://www.bonsaiempire.com/blog/ficus-styling
http://www.batemansbaybonsai.com.au/BonsaiLessons/RootOverRock/
http://www.batemansbaybonsai.com.au/BonsaiLessons/RootOverRock
http://www.fukubonsai.com/1a9a19.html
http://www.fukubonsai.com/1a9a19.html
http://shibuibonsai.com.au/growing-root-over-rock-bonsai/
http://shibuibonsai.com.au/growing-root-over-rock-bonsai
*This site is not related to Arthur Skolnik, recently deceased.
It is important to remember that this has been a salvage operation, and that there are numerous difficulties in taking a mature plant and adapting it to the root-over-rock style. The main difficulty here is in dealing with substantial roots and making them adhere to the rock. So far this has not been successful.
In most cases the root-over-rock style is begun with a small seedling with long roots and a suitable rock to which the tree can be successfully attached. The main challenge and effort here is the ensure that roots actually touch the surface of the rock from the very beginning. The following internet links are worth exploring if you are interested in trying this style out for yourself.